5220

AuthorScott Roewer

HomeArticles Posted by Scott Roewer ( • Page 4)

Dorm Room Organizing Tips For a Successful Semester

Dorm Room Organizing (300 x 300)Don’t be daunted by dreary, diminutive dorm room! We’ve got plenty of ideas to turn your dorm room (or your kids’ dorm) into a fully functional, organized space. Getting the space organized will allow for better concentration, and help lay the groundwork for you (or your students) to have a successful semester at school.

Make room!

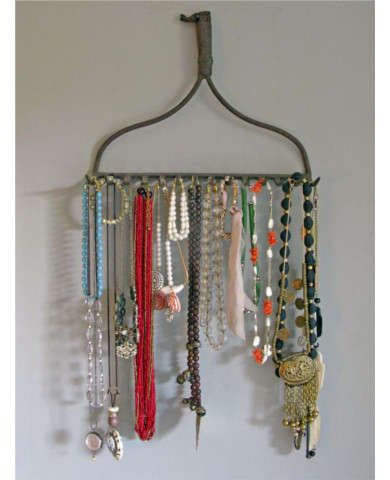
Assess the available space and then figure out how you can make more of it. Over-the-door organizers can wrangle everything from shoes to toiletries to jewelry, and back-of -the-chair organizers keep notebooks, pens and other frequently needed items right where they’re needed.

The simple act of raising the bed, or even creating a lofted bed, can double your storage space while placing bulkier items within reach. Some bed risers now come with built-in electrical outlets, making it a handy place to charge devices or stash a reading light for after hours. Use the space you create beneath the bed to store sweaters, shoes, or books. Under-bed storage boxes (with or without wheels) are perfect for keeping things out of sight but accessible. Choose colors that coordinate with bedding, curtains or desk accessories for a more cohesive décor.
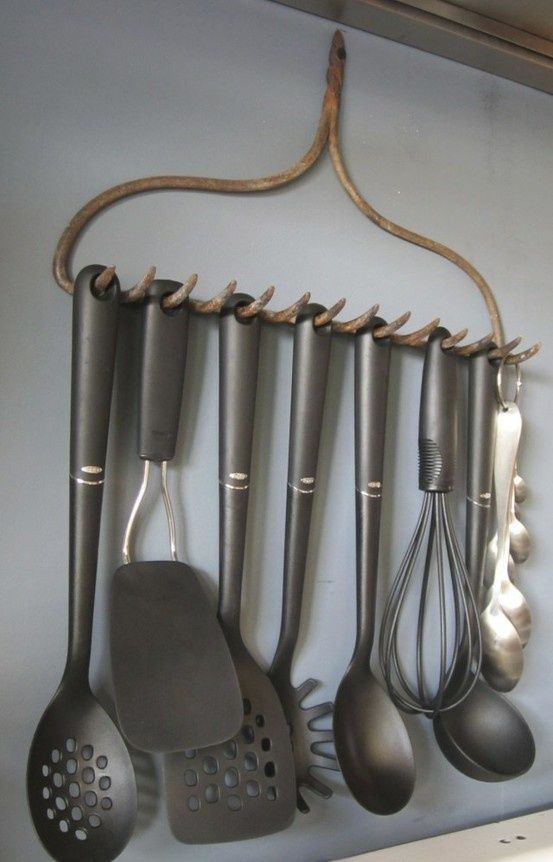
Hang ‘em high.

Curtains can be used to divide your space, to add privacy, or just to mask the mess that so easily accumulates in cramped quarters. Use a small tension rod and curtains to hide stuffed shelves or other storage nooks, to reduce visual clutter and create a more serene environment for your student.
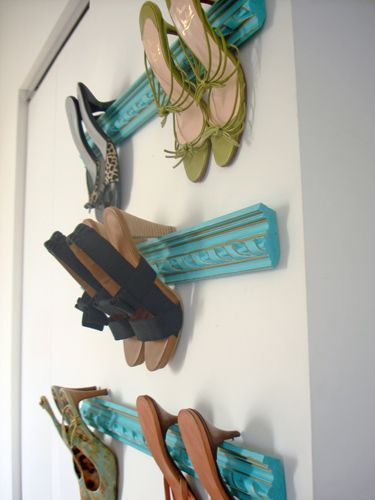
The college hookup.

Perhaps the greatest invention for versatile, temporary living, the removable adhesive wall hook is a must have for all dorm rooms. These inexpensive lifesavers are sturdy, multi-functional, and they come in several colors and weight ranges. The best part is that they are very easy to remove and leave no damage to walls or doors. Use them to keep clothes, towels, and accessories orderly and off the floor!
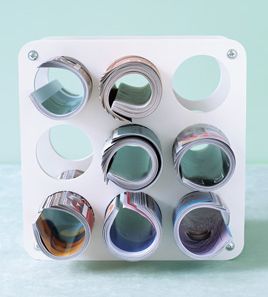
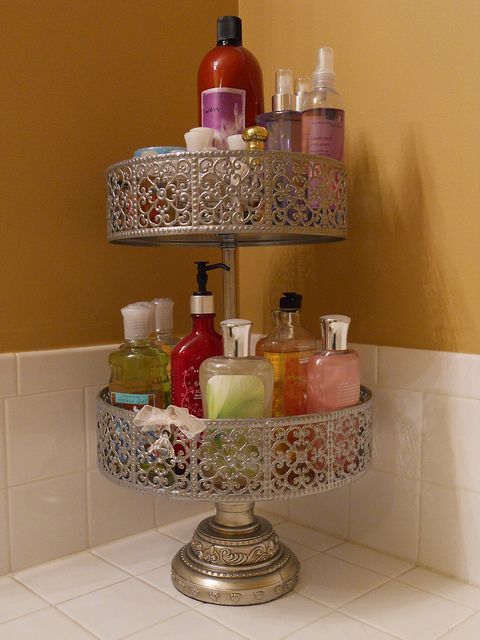
Portable storage.

Communal living is the reality in dorms, so keeping an eye on your personal items is a real concern. Make sure to equip yourself or your kids with a durable, plastic tote to carry their shower items to and from the bathroom. This will save them time, as they’ll only have one thing to grab, and because the tote will easy keep things corralled, it will cut down on the cost of replacing lost or left-behind bottles of shampoo. And don’t forget a pair of flips flops for protection from communal shower floors, too!

Breathe life!

Stave off the stale air of dorm life by adding a small plant or two. Bringing nature inside has many benefits for your health and mood, and small, potted succulents are so low-maintenance that even college students can take care of them easily. Try dressing up the décor by adding brightly colored pots.

Divide and conquer.

A dorm room has to serve several purposes: bedroom, study hall, kitchen, and closet, to name a few. Creating different “zones” for each of these activities will keep the space organized and maximizes its functionality. Try using pegboards, corkboards and corner shelves to define specific areas and make the most of under-utilized wall space.

Also, since the space will most likely be shared with a roommate, it’s a good idea to touch base with them before the semester begins, so you can avoid doubling up on bulkier items such as a mini-fridge, microwave, or television.

Adjusting to college life is always a challenge, and taking the time to organize their new living space is one very important way to ease their transition and pave the way for a successful semester. Are you getting your kids settled at school this year? What techniques have you found work best for creating and maintain a multi-functional dorm room? If you’re struggling with this very question, we want to hear from you! Please share your comments below.

BE PREPARED! Organization Strategies for National Preparedness Month

National Preparedness Month (300 x 300)September is National Preparedness month so ask yourself, how prepared are you? You may be wondering what exactly you should be prepared for, and that’s a great place to start. Identify your family’s needs and get organized now.

Below are our best organizing tips for your Home Preparedness needs.

BUILD PREPAREDNESS KITS FOR YOUR HOME, OFFICE AND VEHICLE.

Assemble a handy kit, preferably in a single container that’s easy to take with you in case you’re evacuated abruptly. Make sure all your family members know where the kit is kept. Include the following items:

  • Water — one gallon per person, per day
  • Food — nonperishable (canned and dry goods are best)
  • Flashlight and/or headlamp and extra batteries
  • Battery powered or hand crank radio (NOAA Weather Radio, if possible)
  • First aid kit
  • One-week supply of medications and relevant medical paperwork for infirmed family members
  • Multipurpose tool – can opener, pocketknife, file, screwdriver, etc.
  • Personal hygiene and antibacterial items such as toothpaste, Wet Wipes, Purell, etc.
  • Copies of personal documents such as passports, birth certificates, etc.
  • Cell phone with chargers
  • Family and emergency contact information
  • Extra cash
  • Emergency blanket
  • Extra set of car/house keys and road maps of the area
  • Baby formula, diapers, baby aspirin, etc., packed in portable diaper bag
  • Games, activities, and comfort items (such as a stuffed animal) to aid in self-soothing for children

If you have family members with special needs, make sure to add any equipment or personal items they will require.

IF YOU HAVE CHILDREN:

One important step in making sure everything goes smoothly in times of crisis is to involve your children in the planning and preparation. This is a great way to teach them what to do in case of an emergency. Ask your kids what they would like to have with them in an emergency kit, and ask them to help you remember to keep the kits up-to-date, by marking their calendars to replace emergency food and water supplies and check batteries’ expiration dates as well. This will make the kids feel like they are a vital part of the process of protecting the family, while instilling in them critical preparedness techniques that will serve them well in the future.

IF YOU HAVE PETS:

Don’t forget your pets’ needs, too! Gather food, bowls, medications, a litter box and litter, paper towels, plastic trash bags, brushes, and a disinfecting household cleanser, as needed. You’ll also want to have a leash or harness, and a carrier for safely transporting your pet under whatever circumstances may arise.

AT HOME:

When disaster strikes and you’re in survival mode, you will fare well to have a sizable supply of non-perishable, easy to prepare canned and dry goods at home. Consider storing enough food supply for up to two weeks. And keep at least a three-day supply of water on hand for each family member, or one gallon per person, per day.

Make sure everyone at home knows where and how to shut off gas, electricity and water supplies to your home, in case they are home alone when something happens, whether it be a broken pipe or an earthquake.

AT WORK:

You need to be prepared to take shelter at work for at least 24 hours. Make sure you have food and water and other necessities (like medicines) in your kit. Also, be sure to have comfortable walking shoes stashed at the office, in case lack of available transportation requires you to walk a long distance.

A NOTE ON WATER:

Following a disaster, you may not have access to clean drinking water.  You should have on hand at least one gallon of potable water, per person per day, however, you should consider storing extra to meet the needs of children and nursing mothers, pets or sick people, potential medical emergencies; or the demands of a warmer climate. During a heat wave, for instance, your water needs could double.

Store water in a cool, dark place, unopened, in its original container until you need it. If you prepare your own water bottles at home, use food grade storage containers (available at camping supply stores) and clean and rinse them thoroughly before use.

Make it a point this weekend to tackle one important preparedness task for you and your family. Which kit will you assemble and store first? Would you feel safer having one in the car than at the office? Make sure before you go to bed this Sunday, that you have prepared yourself and your loved ones… just in case.

Back to School Organizing Strategies for Families

Back to School Organizing StrategiesIn the annual mad rush of back-to-school planning and preparations, parents and their kids are gearing up for another new school year. This is a great opportunity to put a few easy organizing strategies in place at home, to make sure this school year runs as smoothly as possible.

Looking Back to Plan Ahead

Set yourself up for success this year, by reflecting back on what did or didn’t work for you last time around. If every morning in your house is an exercise in chaos, make a list of things that can be done the night before, such as packing lunches and picking out clothes. Also, have a simple, nightly checklist to review so nothing crucial is forgotten – homework, library books, sports equipment and uniforms, or musical instruments, etc. – then have your kids prepare their backpacks and leave them by the front door before bedtime, to cut down on morning stress.

Set Systems in Place

Staying on top of everything that comes in and goes out to school can be a real challenge, especially if you have more than one student at home. Tacking everything to your fridge may be easy, but it’s not a very effective organizing strategy. The best tip for keeping your kids’ papers organized is to create a foolproof system where nothing gets lost.

1.      Calendar Control

Between school functions, lunch menus, after-school activities and recitals, your calendar is probably too full to even read. Take control by creating a central calendar to wrangle everyone’s schedules. This can be on paper, whiteboard, or any other format that works for you – the key isn’t what you use, but that you use it consistently. Take five minutes every evening to refer to and refresh your one-stop time management station.

Create a color-coding system so each family member is seen as a different color on your calendar so you can easily decipher the schedule and help keep everyone’s overlapping obligations straight. Hang the calendar near a telephone, so it’s readily available whenever someone calls with a scheduling request or if you’re using a digital calendar, be sure to keep a tablet or laptop nearby your ‘control center’.

2.    The Paper Chase

Schedule a time each day after school to go through the papers and assignments the kids brought home. Keep only what you need and purge any unnecessary items immediately. This will save time and prevent the dreaded paper pileup. Then separate the remaining papers into two categories: 1) items that require you to take action, and 2) items that should be kept for future reference. Take action right away: sign permission slips, add relevant dates to your calendar, etc.

Then file reference items like class lists, contact information, and school rules in a three ring binder. This will be easier for your kids to search through than a file box, and you’ll always know where the important information is when you need it.

3.     Homework Central

Designate an area where your kids can do their homework each day and allocate a cabinet, shelf or drawer as a homework station to house everything they might need to tend to their assignments – pens and pencils, paper, glue sticks, a ruler, dictionary, calculator, etc. If you have the space for it, add a chalkboard to list recurring or extended projects, so you can stay on top of deadlines and track your kids’ progress.

Ease back into the routine.

The first day back to school after a long and leisurely summer can be a shock to the system. There’s no need to make it any harder than it already is by imposing a bunch of changes on your family all at once. Instead, step into the school year gradually and help everyone feel prepared by introducing them to the systems you created and showing them how they will make things easier for everyone. Make sure that they feel confident as they face the year ahead and you’ll be ready to take on anything that comes their way.

What organizing strategies does your family do to stay on top of the back-to-school bedlam? Are there any unique organizing challenges you need help with? Let us know in the comments below so we can share specific tips for organizing your upcoming school year like a pro!

Continue Reading

Five Ideas for Managing Your Snail Mail

Regardless of how digitized our lives have become, the accumulation of snail mail is still cluttering our homes. While much of the mail goes straight into trash – and those pesky credit card offers go into the shredder – the rest of it requires a simple strategy to keep things from piling up. Here are our tips for sorting the snail mail you still need to manage:

Continue Reading

Cut Clutter in the Bedroom: A How-to Guide

20140506 cut clutter in the bedroomContemplating the purpose of your bedroom sounds a bit silly. It’s right in the name: bedroom. You’re supposed to sleep there. But chances are your bedroom is serving more than one function, and if you don’t have a plan to prevent clutter, it can make the bedroom’s primary purpose of providing you with a relaxing retreat from your daily stresses, very difficult to achieve.

Clearing the clutter in your bedroom can be approached in three steps: surfaces, storage, and scenery.

Step 1: Surfaces

Start by clearing off every surface in the room – dresser tops, bedside tables, and don’t forget the floor! – and tossing anything that isn’t useful to you.

A fast way to make a big impact on surface clutter is to remove the lamp from your nightstand. Switch to a floor lamp or one of countless wall-mounted sconce, and you’ll feel an instant effect on your bedside table. It may be impossible to keep your surfaces completely clear, but try to keep only the most relevant items like your alarm clock and tissues. If your nightstand does not have a shelf or drawer, you might consider upgrading this piece of furniture.

Step 2: Storage

Ideally, you’d have enough storage space to accommodate everything, but realistically, to reduce bedroom clutter, you need to manage your belongings by putting a cap on how much you acquire. One easy way to do this is following the ‘one in, one out’ rule. Commit to donating one old item for every new item you buy, and you’ll quickly learn how to stem any reckless spending! If closet clutter is the main problem in your bedroom, begin by assessing your wardrobe and saving only the items that you actually wear. Be honest and unmerciful. If you can’t let it go, find another place to store or display an item, but reserve the bedroom for items that get used in heavy rotation.

Think about the collections in your bedroom that don’t yet have a proper place to live, and create one to instantly clear clutter and prevent it from reappearing. Like to read in bed? Swap out your nightstand for a small bookshelf. Can’t curb your shoe collection? Hang a high and shallow shelf along the length of each wall to keep your favorites on display and off the floor. Who doesn’t love shoe art?

If your closet is so small that your wardrobe – or any items that should be living out of sight, not in your bedroom – is spilling out into the room, then it must be tamed. You shouldn’t live beyond your means when it comes to finances or closet space. Devise a workable budget of space for your belongings that live in the bedroom and its closets, and stick to it! If you have the space in your bedroom to accommodate piles of clothes, then you probably have space for a piece of furniture to house them. Consider an armoire or a dresser to provide the storage you need to unclutter the overflow for good.

Step 3: Scenery

The third consideration is scenery this is purposefully soothing. Make sure the more detailed or “noisy” patterns in your room are used in small doses, like curtains, pillow shams, or lampshades, for a calm and less cluttered vibe. Choose carefully what is to be kept out and on display, and be mindful that even your cherished collection of perfume bottles may be creating visual clutter. Also, studies show that observing nature lowers blood pressure, so bring a plant into your bedroom to subconsciously increase your positivity.

Keep these three steps in mind and you’ll be enjoying a clutter-free bedroom in no time. Spend a few minutes every day putting everything back where it belongs and prevent clutter from creeping back into your peaceful sanctuary. And don’t forget, if an organizing project isn’t getting done because it’s too overwhelming to begin, there are always professionals who are happy to help.

Please share in the comment section what kind of clutter your bedroom has been collecting. What has been your biggest obstacle to getting it under control? If you have an ‘after’ photo we would love if you would share it on Facebook and tag us!

Continue Reading

How to Create a Paper Filing System

How-to-Create-a-Paper-System 300No matter how much you’ve converted to paperless practices, your home and office will always collect a certain amount of paper to be filed away. If you don’t want unruly piles gathering, having a system – and a schedule – in place makes filing much simpler. Start by considering what you actually use in your files and then create the filing system that suits your needs.

What paper are you saving and what really needs to be filed? Are you keeping records of household accounts, research relating to your small business or other kinds of paperwork? Do you need to have access to them daily? Weekly? Are your records mostly long-term documents or vital records such as mortgage agreements or marriage certificate, which you only need to pull out once in a blue moon? Assessing how much paper comprises each category will help you determine where to file it all. There are a million ways to create a file system. Below, we’ve provided a guide that will work for some and not for others. If you need help, give this system a try and let us know if it works for you.

Set up a file for your “must do” items and a system for frequently referenced files. Create an action items file, and label each item that goes into it by the appropriate action category: To call, To pay, Do @ computer. If it helps you stay on top of things, you can color code items according to level of urgency.

For household projects, business expenses or other current activity, your files should be located nearby for quick, easy accessibility. I call this area ‘prime real estate’. Choose hanging files if you’re using a traditional filing cabinet or whittle it down to a small, upright desktop file rack – either way, opt for vertical files over flat stacking-style inboxes. Be a “filer” not a “piler”! If piling is a must (and it is for some) user clear files to organize your stacks. It is much easier to shuffle through a few clear folders instead of a stack of loose papers.

Why miss the opportunity to freshen your office décor by adding an adorable collection of desk accessories? Whether you use tabs or labels, make sure to use clear lettering and bold, legible ink. Don’t overcomplicate it and remember that you can digitize most paper, even if it didn’t come to you electronically. To keep the paper clutter at bay, institute a filing system you can follow, and funnel your incoming papers there regularly. Choose a logical spot to wrangle all your incoming papers, (mail, permission slips, building notices bills, etc.) and create a routine for managing those papers.

Schedule scan-and-purge sessions every week/month to stay organized. Check our recent post on what files you can shred and when, and schedule an annual date to thin out your files accordingly.

Not everyone is passionate about taking piles of unorganized paper and creating attractive, functional filing systems, but to me, few things feel better than comparing what was once the chaos of a client’s paper-logged office to their newly organized, clutter-free and unburdened space. And trust me, a manageable filing system makes the biggest difference, every time.

How often do you deal with your incoming paper? Weekly? Monthly? Never? Do you have a system that works for you? Please share in the comments below your personal paper filing challenges and solutions. If we receive 10 comments on your personal systems, I’ll even post a photo of my personal filing system.

Continue Reading

Seven Tips To Organize Your Closet

Closet Organizing Tips (300 x 300)Do you have a disorganized closet? If that closet happens to be in your bedroom, we recommend gaining control of that space ASAP! You start and end your day in the closet and if it is disorganized, you’re starting your day and ending your day in chaos.  There is a better way and organizing your closet is possible!

Here are seven steps for organizing your closet. Ready? Set? Go!

1. Empty

You need to empty out the entire closet completely. Completely?  Yes, completely!  As you empty the closet try to keep the items in groups matching like items together.

2. Clean

Now that the closet is empty, take a few minutes to vacuum and dust the shelves and baseboards. It’s nice to start your organization project with a clean slate.

3. Sort

Now, if you didn’t group like items together when you took everything out of the closet you want to begin the sorting. Sort all of the clothing and accessories into categories such as: jackets, pants, shirts, skirts, belts, shoes, and so on. If you have trouble with this, make it easier by sorting into three categories: Tops (shirts, blouses, etc) and Bottoms (slacks, jeans, skirts) and Accessories (shoes, belts, purses).  Note we don’t have a category for mail, books, paper, etc. If possible we want to find storage for those items in another space!

4.   Edit

As you are sorting your items, it is the perfect time to edit out the items that should be donated, mended, cleaned, or consigned.

5.   Replace

Start with one category and return those items back in the closet. We often will group the clothing by color within the category and sometimes by season if space allows.

6. Backward

Replace the hanger ‘backwards’ so the tip of the hanger is facing out. Once you wear the item replace the hanger ‘normally’ so the tip is facing the back of the closet. At the end of the season you’ll know that all the hangers that are still backwards you did not wear.

7. Delivery

Now that you edited your garments, don’t forget to deliver the donations, mending and consignment to the appropriate vendor. Also, if you keep a paper shopping bag in the bottom of your closet, you can edit all year long. Each season drop items into the bag you will no longer fit or that you want to donate. Once the bag is full take it to your favorite clothing charity or consignment store.

Continue Reading

Earth Day Continued – Seven Great Repurposing Ideas

There is a special sense of satisfaction that comes from finding a new use for an outdated item. It can be an unexpected way to create a visual interest in your home, while also filling an organizational need – and best of all, it reduces waste and saves money. In honor of Earth Day, we’ve collected some of our favorite repurposing ideas from around the web.

1. Wine Rack As Magazine Holder

Using a wine rack to keep you magazines handy is not just a creative alternative to traditional magazine racks, it makes it easier to see what you have, and prevents you from collecting too many issues at once.

Photo credit: James Wojick

2. Funnels As Dispensers For Twine, Yarn Or Ribbon

This idea can be applied everywhere from the kitchen to the crafts room to the garage. Affix some inexpensive funnels to the wall or to a sturdy pegboard, and make your unruly string-like collections functional, easy-to-access and absolutely adorable.

Photo credit: Martha Stewart Living

3. Wood Shutters As Organizing Stations

There are countless uses for old shutters of every shape and size. Paint them to coordinate with your décor and use them to corral keys, mail and family messages or reminders. Add clips and hooks for extra functionality. Visit 5 Things to do With…Wood Shutters for more repurposing ideas.

Photo credit: lifeasathrifter.blogspot.com

4. Crown Molding As Shoe Display 

For the shoe-lovin’ women who enjoy ogling their footwear as much as they love wearing it, this DIY tip will really deliver. Hang molding like shallow shelving to keep your shoe collection in view. It’ll keep them accessible, while allowing you to see what you have. No less than these little works of art deserve!

Photo credit: Fashion Diva Design

5. Cake Stands To Organize Clutter in the Bathroom

How many beautiful serving pieces do you have hiding in your kitchen cabinets that never see the light of day? This fantastic repurposing idea brings them out for you to admire, while clearing clutter from your bathroom counters or the top of your dressers. Collect lotion bottles, perfumes, hair accessories, or other odds and ends in your under-used cake stand… and clear out some storage space in your kitchen cabinets, too!

Photo credit: westerly_whimsies via flickr

6. Make That Rake Do The Work For You!

If rustic country charm is you’re your style, then you’ll love these ideas for repurposing old rakes. You can hang them with the handle, if your space allows, or use just the head of the rake – or several grouped together – to display everything from jewelry and scarves, to kitchen utensils and stemware. Be sure to scrub the rake well before hanging, and then enjoy your new clever and highly functional display.

Photo credit: sortrature.com

 Photo credit: twighome.com

Photo credit: Green Renaissance

7. Set A Place for Your Furry Friends

It’s easy to turn an old bench or children’s chairs into a unique feeding station for your beloved pooch. It will look great in your kitchen, and also raise their food and water bowls to a more comfortable height. Just cut holes into the seats to rest the bowls in and you’re done!


Photo credit: bhg.com

If you have a favorite repurposed item in your home, please tell us about it in the comments below. Or, let us know about a piece you’d love to find a new use for… we’re always full of ideas for breathing new life into your old treasures!

Continue Reading

Earth Day! Green Organizing Tips For Your Home

Earth Day Green OrganizingBy now, you’re probably well into your Spring cleaning efforts; purging, organizing and repurposing items throughout your home. It feels great to refresh your space for the benefit of you and your family, and it feels even better when your efforts are also helping the environment. We just celebrated Earth Day on April 22nd, so I want to share some small tips on green organizing that can make a big difference in your home and for the planet.

“Going green” when organizing your home can be done in a variety of ways. It involves removing toxic materials, recycling rather than disposing, and upcycling or repurposing things to extend their functionality and reduce waste. We’re all familiar with the green mantra of “reduce, reuse, recycle,” so the obvious place to start your green organizing is by reducing the amount of stuff you bring into your home. Paper clutter is a huge part of that, so take control of it by contacting the Direct Marketing Association to eliminate incoming junk mail. You can also stop receiving those annoying credit card offers by visiting OptOutPrescreen.com.

The reuse portion of going green can be the most fun and creative, and it offers a great opportunity to teach your kids how to be environmentally responsible. Go through the house with your kids and collect some items that they can help you repurpose: decorate empty cereal boxes that they can use to collect their comic books, or show them how to use plastic food containers to organize their art supplies.

After you’ve pared down your belongings to the items that you truly love (and you’ve found a place for it all), it’s time to recycle what’s left. Think bigger than your weekly collection of plastic bottles and newspaper… your recycling can include donating clothing, furniture and appliances, books, toys and anything else that another family might need. Make sure the items are in good shape before boxing them up and delivering them to your local thrift store, church or other appropriate charitable collection location. You’ll not only be giving these items new life, you’ll also be helping to save the planet!

If it seems overwhelming to take on your whole house at once, break it down room by room. Keep these simple guidelines handy, and you can make great strides very quickly: In the kitchen: replace toxic cleaners with safer alternatives. Be sure to dispose of chemicals properly and don’t just toss them in the trash or pour them down the sink. In the closets: collect any clothes you’re no longer wearing and donate them to charity. In the office or family room: gather up your outdated electronic devices and make sure they end up in electronics recycling not the landfill.

With green organizing, it only takes a little effort to make a big impact. What’s your favorite way to go green at home? Share your ideas in the comments below and help our readers make this the best Earth Day ever.

Continue Reading

Your Garage – What To Toss And How To Toss It

What to Toss and How to Toss ItEarlier this month, I posted some tips on how to bring your Spring cleaning efforts out to the garage. While people put off cleaning and organizing for any number of reasons – it seems like too big a job, they don’t have time, they enjoy the process only slightly more than having root canal – when it comes to the garage, some people avoid getting organized because they don’t know how to deal with what’s out there.

When clearing out accumulated clutter in the garage, it is important to find out the best way to dispose of hazardous materials, rather than just tossing them out with the regular trash. Much of what we store in the garage can be very dangerous to our environment, health, and safety if it isn’t handled properly. Fuel-burning machinery from your car to your lawnmower rely on some highly toxic, flammable, and environmentally hazardous chemical that can cause tremendous damage unless proper precautions are taken.

To prevent toxic fumes from collecting, it is important to store potential pollutants in well-ventilated areas, preferably in a structure that is completely detached from your house or living space. Off-gassing can occur from everything from paint to pesticides, from fertilizers to organic solvents, and exposure to these common compounds can pose serious health risks. It is important to read the product labels for instructions on how and where to safely store these items.

When it comes to disposal, however, you may need to do a bit more research than just checking the label. Check out the Household Product Manufacturer Directory from Home-Air-Purifier-Expert.com for detailed information on 6,000 products from 354 manufacturers in North America. If you are interested in protecting yourself and your family from the dangers that you may not know are already present in your home, then check out their page on common household hazards.

Methods of disposal vary by county, and you can usually receive instructions on how to handle various substances from your local recycling center. You can find out how to dispose of chemicals and solvents, old batteries, computers and other potentially dangerous items, and also learn about proper usage and storage, to reduce the impact these substances have on the environment.

If the collection of chemical clutter in your garage has you confounded as to how you should get your Spring cleaning underway, a simple Google search will lead you to your county’s hazardous waste and collection guidelines. In Washington D.C. or the surrounding areas of Maryland and Virginia, check these links for your local waste disposal information: Montgomery County, Maryland, Prince Georges, Maryland, Washington D.C., Alexandria County, Virginia, Arlington County, Virginia, and Fairfax County, Virginia.

Have you been avoiding your garage garbage year after year? Comment below and tell us one thing you plan to take care of this Spring to make your garage a cleaner and safer environment once and for all. Or, simply give us a call and we’ll make it happen for you!

Continue Reading

Tired of being disorganized?

DOWNLOAD YOUR FREE DECLUTTER REPORT!

“11 Things to Discard Before Monday”
Get started immediately with
free organizing strategies*.
 
11 Things you're guaranteed to not need.
Some are funny while others are meant to stretch you.
Get started today!

Yes! You're ready to get started. Please check your email now to confirm you're not a robot. We'll send over the PDF once you prove you're human.
GMail users - check the 'promotions' tab if you're on your computer. Anyone else, please check your spam folder if you didn't get the confirmation email.