6365

AuthorScott Roewer

HomeArticles Posted by Scott Roewer ( • Page 2)

Why Can’t I Get Organized? Part 1: Practical Missteps

Practical Missteps Part 1Our new blog series is aimed at identifying the real reasons behind your struggles with getting organized. So many people want to have order in their daily lives, but they don’t know where to start. This series of posts will highlight the three categories into which 99% of people fall when it comes to problems with organization: Practical Missteps, Situational Challenges, and Internal Obstacles.

This week, we’ll look at what specific Practical Missteps may be tripping you up. If you see yourself in any of the following examples, then stay tuned to future blogs for tools and tactics to overcome them once and for all.

Practical Missteps are technical and mechanical mistakes in the way your systems are set up, or they may be a simple lack of know-how. Ill-designed systems lead to chaos, clutter, and tons of time wasted, but if your problems are of a practical nature, they are also the easiest to fix. We find Practical Missteps are in existence 100% of the time.

When assessing a new client’s situation, certain patterns quickly let me know that Practical Missteps are the main hurdle stopping them from getting organized. These patterns include belongings that have no place to live, inconvenient or illogical storage systems, or an overabundance of stuff that doesn’t fit into the available space. These are all problems that can be addressed with straightforward, sensible solutions.

Pattern #1: Items Have No Home/Inconvenient Storage

Do you have piles of stuff everywhere, waiting to be put away, but you don’t know where to put it? Perhaps you’ve tried to use the available closets or shelving, but you find yourself stacking things near, rather than inside, its intended home. If a storage solution is ill-fitted or has restricted access, even the most well-intentioned person will not be inclined to use it.

When stored, items should not be difficult to reach, and storage containers should be chosen specifically for the things they are meant to hold, as well as where they will be used. This means issues of visibility, accessibility and size must be considered while creating your systems. By planning your system according to what needs to be stored, rather than trying to fit your belongings into whatever solution first presents itself, you will create an effective, stress-reducing system that is simple to maintain.

Pattern #2: More Stuff Than Space

If you are constantly putting things away but you find that the STUFF is still taking over your life, you’re facing a Practical Misstep of having more belongings than there is space to accommodate. Even the most organized people can’t fit the ocean in a paper cup. The first solution here is to create additional storage where you can, and secondly, pare down by mastering the Art of the Edit.

The Art of the Edit is a key step in almost every overhaul of an organizing system. When you learn how to employ a logical system to determining what you should keep and what you can let go, you will free yourself from what some people find to be a crippling debate. The decision about what to do with this or that doesn’t have to stop a would-be organizer in their tracks. Applying a simple list of questions will take all the stress out of it, and lead you through a process of unburdening yourself that you might find surprisingly enjoyable! (If your trouble with letting go stems from a deeper fear and it’s the reason you are living with more stuff than your space can fit, then you may fall into the third category, Internal Obstacles, which we will address in a future post.)

Pattern #3: Out of Sight, Out of Mind

If you tend to leave things out so you can see them, stacked on your desk or kitchen counter, or piled by the front door so they’ll catch your attention as soon as you walk in, you’ve probably figured out by now that this is not an effective organizing strategy. Leaving things out as a visual reminder does nothing to help you deal with these tasks, nor does it alleviate your fear of forgetting what needs to get done. With so many things lying around vying for your attention, everything ends up being overlooked amidst the visual clutter.

Once you identify yourself as someone who responds to visual cues then you can work within those parameters to create a more effective organization system. A workable storage solution is the key. Display your things in a way that makes them stand out visually while giving each item a distinct home that is neither hidden from view, nor easy to ignore. Get in the habit of putting reminders on your calendar or setting alarms on your smartphone so you always remember to grab what you need before you go. Perhaps you might try a whiteboard on the back of the door where you write visual reminders for that day or week. By putting things in the same place every time, you create a routine, making it second nature to visit that place daily before you leave the house. Soon you’ll find that forgetting things is no longer a problem for you.

If you think Practical Missteps may be the reason you haven’t yet gotten organized, then keep an eye out for future posts that will take on specifics from how to design a system that will work for you, how to find the right tools and equipment to implement your system, and how to maintain and adjust your systems to stay organized in the New Year and beyond.

Let us know what your organizing goals are for 2015 and what’s been stopping you from getting organized in the past. Ask your questions about Practical Missteps in the comments below and check for our answers in future posts!

Organize Your Laundry Room Once And For All!

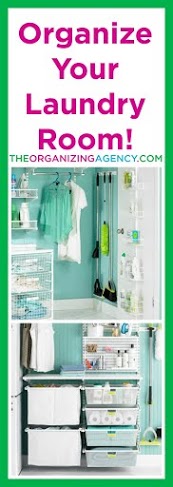
2015-01-27 Laundry Room Body of Post imageIs there anything messier – or more annoying – than piles of clothes waiting to be washed? If you have a laundry room in which to collect yours, you’ve probably noticed how quickly it can become dumping ground for all things that need cleaning. Unfortunately, if there’s no readily apparent system in place, then those cleaning jobs can sit and wait… and your dread will continue to grow. Read on for solutions you can implement right now to organize your laundry room for good.

Whether you have your washer and dryer stashed in a tiny closet or they’ve got their own room with plenty of space to accommodate, make sure you use every inch of the available space to organize your cleaning and laundry supplies. Keep these things in mind as they relate to your space and you can create your perfect, fully functional laundry room:

Sort it out.

When it’s time to do the laundry, employ an organized approach. Have your clothes presorted beforehand and you’ll be done in half the time. First, if space allows, locate the best space to house an appropriately sized triple-sorted hamper for whites, lights and darks. There are plenty of options from side-by-sides to stacking models. Collect dry cleaning separately, in a portable tote, so it’s ready to grab and go. You’ll know it’s time to run a load when one or more of the hampers are full.

Keep it together.

A big step towards organizing your laundry space is to contain all your supplies in neat and easy-to-access caddies. Use the empty wall space behind your washing machine to install a shelf for convenient storage. Add an attractive, sturdy basket or fabric covered bin to hold your soaps, bottles, brushes, etc. Not only will they look tidy on your shelf, they’ll also allow you to grab everything you need at once for laundry or tub scrubbing or whatever task is at hand. Choose canvas containers all in the same color (or in complementary shades) for a happy facade. If you’re worried about liquids in baskets, there’s nothing wrong with selecting a plastic tote or bin you love.

If you keep your washer and dryer in a basement or other generously sized space, consider installing an island with shelves to hold your laundry baskets, getting them off the floor and out of sight when you’re not using them. The counter above provides the perfect place for folding clothes as the come straight from the dryer.

Hang it up.

If you suffer from tiny laundry room syndrome, the lack of space has probably spawned piles of draped clothing over the dryer, and any other available surface. The solution is to make the most of your vertical space. Utilize behind-the-door hooks and rods to hold hanging clothes, or a fold-up ironing board and adjustable height baskets. A retractable clothesline or two can raise delicates overhead and out of the way while they dry.

Make it home.

Pets are messy, but they’re family. Since fur babies come with a whole host of supplies, and they do require cleaning themselves, the laundry area is a logical place to keep it all. If your pet’s stuff seems to be taking over your house, designate a “pet zone” in your laundry room. Move a bed or crate there and add hooks for extra leashes and brooms, and an extra water dish. Place everything your pet will enjoy out of the room’s traffic flow and away from any drafts, so they’ll be warm and cozy while they help you fold clothes.

Just because your laundry room is a utility-oriented space doesn’t mean it has to be devoid of all personality. Add some color and a bright light fixture, or hang a few family photos. Using cheerful curtains to hide unsightly supplies can also make it welcoming. Consider a cork board to pin up stain removal tips or simply add images that make you smile. If you create a space that is attractive, functional and organized and you’ll find that staying on top of your laundry and other cleaning chores will be far less stress-inducing.

Have you managed to control the endless cycle of fluff and fold? Tell us how in the comments below, and share your laundry mess with us so we can clean it up with you!

Organizing Your Spice Rack: A Recipe For Success

Organizing Your Spice Rack: A Recipe For Success

If you like to cook and you’ve amassed a sizable spice collection, you probably struggle with keeping it organized. You may dream of a spice rack with uniformly sized jars and matching labels, but we can’t all have Martha’s kitchen. Don’t worry about finding the “perfect” solution, and instead try to find the storage method that makes the most sense with the way you cook.

The trouble with trying to make everything perfect is that as soon as you add a new spice to the mix, that solution is ruined. Sort through all your spices and decide what to keep, what to toss (if you haven’t used it in the past year, you probably never will), and identify duplicates that can be joined together. When you’ve pared down the collection, you’re ready to get organized.

Your Organization Method

Consider the basic organization structures for your spices: often used vs. rarely used; cooking vs. baking; ground vs. whole; or alphabetical. The simplest, most functional method is to keep your most frequently used spices closest at hand. This means having them at eye level, either on a rack, or on the first shelf of your spice cabinet.

However you choose to store your spices, always keep them away from excessive light or heat, as these can dry out and damage their essential oils. That means your spice storage should never be in direct sunlight or in the cabinet directly over your stove. Always make sure all your spices are visible, because you won’t use what you can’t see.

Your Storage Options

When it comes to spices, storage options must address not only where the collection will be kept, but also what containers you’ll use for each individual spice. Storing spices in different sized jars is not a very elegant solution, so if your spices are out in the open and you want a uniform look, rather than trying to get everything to fit into the same size jar, choose different sizes of the same style jar.

A modern twist on the traditional spice rack, magnetic tins offer an attractive uniform display, and most have clear lids for visibility. Mount the magnetic sheet to your wall in a place that’s convenient, but not too close to the stovetop or other heat sources that will degrade the spice quality.

If a cabinet is the best option in your kitchen, outfit yours with a multi-tiered Lazy Susan to keep jars from getting lost in the back of your shelves. I personally use trays that fit my cabinet shelves. I can take each try down to find what I want and use the full depth of my cabinet. If your kitchen has a lot of drawer space, you have the option of creating a spice drawer. Organizing drawer inserts keep spice jars visible, on a fixed or sliding inclined tray. These organizers save cabinet space, but they tend to accommodate only smaller jars, so be sure to measure everything before you buy.

An international note: If you cook often, you might find the masala dabba technique of spice storage a pleasant change of pace. This traditional Indian display uses a flat tin to corral smaller containers of spices, ensuring your most commonly used spices and spice blends are easily accessed. This method is not usually manageable for larger collections, but you can try keeping a few different masala dabbas for each style cuisine you like to cook.

How do you store your spices and how is it working for you? Let us know in the comments below which method you use, and if you have a spice rack you’re particularly proud of, share your photos with us, too!

Continue Reading

Delete the Stress of a Disorganized Inbox – How to Keep Your Inbox Organized

Does every ping that you get when a new email arrives bring with it a tiny rush of panic? Has your inbox become the equivalent of an online junk drawer? An easier-than-you-think inbox intervention will uncover the secrets to organizing your email and deleting the stress forever.

Taking control of your incoming email will instantly reduce your anxiety and the good news is that getting started is never as painful as you imagine it will be. If your inbox is so stuffed that you’d sooner sign up for a voluntary root canal than sort through the emails, that’s a good sign that it’s time to stop avoiding the inbox clutter and start organizing.

Keep Your Email Inbox Organized

Begin By Purging Your Email Inbox:

Go through quickly and delete as much as you can, but don’t let yourself getting bogged down by any one message. I recommend sorting the emails by sender, so you can delete all the emails from stores and discount sites (like Gilt Group, Groupon, etc.) all at once. Also, as you’re deleting, take the opportunity to unsubscribe from any and all unwanted mailing lists, once and for all. If you’re a Gmail user, check out Unroll.me to opt-out of these sites all at once. You may also want to register with the National Do Not Mail list (read more about it at DirectMail.com). If you’re being bombarded with useless emails from your social media profiles, a quick tweaking of your Facebook or Twitter settings will ensure that you never have to delete another redundant notification email.

Set Filters for Your Email Inbox:

After you’ve cleared the deck, be selective about what is allowed back in. Depending on which service you use, you have various features available to reduce the inbox influx. Gmail uses filters to redirect some emails, meaning they will skip your inbox automatically. If you like to use folders for your email, adjust your settings to filter everything from a designated source and file it directly into a specific folder. For example, incoming e-bills can go straight into your “Finances” folder and you won’t have to see them until you need them, but you’ll always know where to look for them. Once those bills have been paid, keep the “Finance” folder current by deleting those emails. And the best part of the filtering feature is that you can send unwanted junk mail straight to the trash!

What to Save and Where OUT of Your Email Inbox

If you’re going to save emails in folders, then do it in a way that makes sense to you, so you’ll be inclined to use them. Create folders for all recurring topics (clients, vendors, friends and family, research, upcoming events, etc.). Your inbox should have only new or unread mail or action items. Once an email is opened, do the following:

  1. Take Out What You Need – Save contact information to your address book. If the email contains a relevant date, mark it on your calendar. If there’s a useful attachment, download it. If there is a To Do item, put it on your task list, and then delete the email. Yes, DELETE THE EMAIL!
  2. If the email contains something important, that could “Save Your Tush” someday, move it to a folder marked “Done,” “Read,” or “Completed.” This indicates that you’ve read the email, taken any necessary action,and you’re now finished with that email, so it no longer belongs in your inbox.
  3. If you resist the above and want to use folder to organize your tasks – once an email is opened, it should  immediately be filed in the appropriate folder. The folder names should represent the “Action” associated with the items in that folder.
  4. If you open an email and do not have time to respond to it that moment, move it into a folder named “Response Required” and reply to the emails in that folder in chronological order.

Set rules for yourself. Prevent the pile up in your inbox from returning by setting some parameters and agreeing to stick with them. Start with the following and add to them based on how you use your email and how often you check it.

  1. Don’t Check Your Email! Or at least don’t check it every five minutes. Schedule specific times every couple of hours or just twice a day (if you’re very disciplined).
  2. Don’t Let Your Inbox Run Your Day. By only responding to your inbox, you’re letting the emails drive what activities you do. Don’t let your inbox run your day by using your inbox as your To Do List. Remove the action items and put them on an actual To-Do List.
  3. Do It Or Delete It. A new email should either become an action item, or it should be immediately filed or deleted.
  4. If you have a longer message that will take more time to read and respond it, move it to your “Response Required” folder. Remember, “later” isn’t an actual time period, so determine when you’ll do it and put that time on your calendar.
  5. Do Have Weekly Wrap Ups. If you slipped up during the week, allow time to clean out your inbox at the end of the workweek. Take 10 minutes to sort through your inbox, and delete items you’ve already taken action on, add items to your task list, or move emails to action folders. Always respond first to those emails that you’ve been neglecting the longest.

Taking control of your inbox isn’t a one-and-done job, but maintaining order doesn’t have to be a pain. Once you’ve set the rules that work best for you, it won’t take long (just a few weeks) to turn your system into habit.

Do you have a workable routine or is your email system pure mayhem? Tell us what stresses you out about managing your email and what you’d like to fix about it. Share your tips for taming the beast and help your fellow readers get organized, delete and de-stress.

Continue Reading

How To Organize The Area Under Your Kitchen Sink: In Eight Eeasy Steps

Do you flat out fear the dark chaos under your kitchen sink? You’re not alone. The default dumping ground for cleaning supplies in most households is a poorly lit cavern of pipes, spray bottles and trash bags. If finding what you need under the sink means digging blindly through the mess, knocking over buckets and bug sprays when you’re reaching for your Lysol Wipes, then this post is for you.

These eight easy to implement tips will turn the clutter under your sink into an organized, functional storage space that instills peace instead of fear – and it will only take you a few minutes.

1. The best solution if you don’t want to have to reach into a dark cabinet is to install a slide out drawer. Available in a wide range of materials, choose a gliding drawer or bin with a water resistant finish so it will stand up to any potential moisture under the sink. Also, when measuring, allow clearance for pipes and retractable hoses from the sink above. Gliders can be easily installed, allowing you to pull supplies out into the light, easily reaching what you need. We can help our clients with custom, measure to order, glide outs that will transform any cabinet.

2. While gliding drawers allow you to retrieve items stored in the back or your cabinet, if you’re living in a rental home, installation may not be an option. Thankfully, there are plenty of plastic drawers available that are small enough to stash under the sink. Use them to organize your extra sponges and other smaller items that can get lost down there, creating unwanted clutter. Stacking drawers make the most of vertical space, uncramping your unkempt cabinets… with style!

3. Choose cabinet inserts to double your storage. A small, elevated shelf under the sink is perfect for maximizing vertical space. Get one tall enough to stash bottles underneath, and elevate paper goods, boxes or anything that would be ruined in case of a leak.

4. Take-along totes make it easy to grab your cleaning supplies and go wherever they’re needed. Use a small basket or bucket with a comfortable handle to corral your go-to cleansers, brushes, sponges, etc., and make them easily portable.

5. If you have a generously sized under-sink cabinet, then getting it organized can also buy you enough space to solve your unsightly trash bin troubles. Roll out bins keep your garbage out of sight and within reach. Dual bin options keep recycling under wraps, as well.

6. Make room by installing a small curtain rod under your sink to suspend your spray bottles for instant organization. A heavy-duty tension rod should be sufficient if you don’t have too many bottles, but a screw-mounted model is preferred to accommodate their weight. If hanging them by their triggers makes it difficult to see what’s what, add labels to the back of each bottle.

7. Stop unruly rolls of trash bags from unraveling under your sink with coffee cans or a plastic storage box. Simply cut a hole in the top and pull the bags through one at a time or, if you still buy coffee by the can, cut a slit in the top of the plastic coffee can lid and pull the bags through.

8. A Lazy Susan can mean your never have to stick your hand into the creepy darkness again! Place one of these rotating solutions in your cabinet and load it up with bottles and cans, then spin your supplies around until you find what you need.

In ten minutes, you could try a few of these tips and truly transform your under-sink storage. What idea will work for under your kitchen sink? Do you have a challenge we haven’t solved or do you have a photo of your sink that you need help with? Comment below and let our readers share their solutions with you or upload to our Facebook page your organized under sink area.

Continue Reading

How To Get Rid Of Bad Smells At Home – A Guide To Banish Bad Smells For Good

????????Have you ever walked into a house and been greeted by the delicious smell of fresh baked cookies? Now think about walking into someone’s home and getting smacked in the face with the stench of wet dog. Which makes you feel more welcomed?

Every home has a unique scent, and you never want yours to be recognized for being unpleasant. Smelling fresh really means to smell like nothing, so if you want your home to smell fresh, it needs to be clean and dirt-free. Luckily, we’ve got some very effective tips for making sure the aroma in your home is always as inviting as can be

TIP 1 – Ventilate nature’s way. Open a window when weather permits and let the breeze blow through. Sunlight also works to kill some surface bacteria on fabrics, preventing odors before they start.

TIP 2 – Shampoo your carpets and upholstery regularly, or bring in the pros to do it for you. Better yet, remove the carpets all together, especially if you struggle with pet odors or you live in a region where there is a lot of moisture and humidity that brings with it the awful stink of mildew. Hard floors and area rugs are easier to keep clean, and they won’t hold odors like your wall-to-wall carpets do. But whatever surface floors you have, don’t track smelly dirt across them. Create an area near your front door for shoes and make your home a shoe-free zone.

TIP 3 – Keep it moving. Don’t let air or odors sit and get stale. Empty garbage cans and litter boxes often, and never let compostable food sit in the house overnight. Make sure there is adequate ventilation in the kitchen and bathroom; add a fan to remove moisture and odors from each room.

TIP 4 – Go towards the light. Believe it or not, the light bulbs in your home can not only hold on to stale smells like smoke or food stench, they can also spread a good smell quickly and for a long time. A build up of chemicals coats the bulb over time, and when the bulb begins to heat up, the clinging offensive odors will return. Make a point to wipe down your bulbs regularly and, if you like a bakery-fresh smell, try dabbing a few drops of vanilla extract on your light bulbs before you turn them on, while they’re still cool. When they heat up, the yummy scent will fill the room.

TIP 5 – Deodorize, Naturally. There are several ways to deodorize your home without introducing harsh chemicals or manufactured “freshness” to the air you breathe.

  • Leave a bowl of vinegar in any room for 24 hours to remove the strong food odors or smell of cigarettes.
  • Add 10-20 drops of your favorite essential oil to a clean spray bottle, then add a mixture of 3 parts water to 1 part vodka (yes, vodka!). Spray throughout your home as an affordable, safe alternative to artificial room sprays.
  • Keep the welcoming smell of the season permeating your home by boiling cinnamon sticks on your stovetop. Continually add liquid to the pot to prevent it from burning, and you can keep it simmering for hours. Ginger and citrus also offer resonant aromas that can be used to fight stale smells year round.

Give some of these tricks a try and we’re sure you’ll find a method that works for you. Have you uncovered any unusual ways to get rid of funky smells in your home? Tell us your favorite odor-busting tools in the comments below.

Declutter And Dress Your Guest Room For The Holidays

Holidays bring with them all sorts of gifts, but the one that you never like to be surprised with is an unexpected houseguest. Make sure you’re prepared for anything – or anyone – by taking a few steps to declutter your guest room, and add some welcoming touches before company arrives.

Step 1 – Empty it out. A spare bedroom is often the catch-all for stuff in your home that has no place else to live. But your guests won’t feel relaxed surrounded by junk, so anything that doesn’t belong in the room should be removed. If you have trouble editing your belongings, just remember that anything stashed in there that you weren’t already missing, won’t be missed if it’s gone completely.

Even a spacious guest room can start to look like a thrift store if it’s crammed with more furniture than it can comfortably hold. Your guests won’t feel welcome if you put them in with the rest of your discarded items, so keep just what they’ll need: a bed, nightstand, comfy chair for reading or watching TV, and a small table that can be used as a vanity or writing desk.

Step 2 – Attack the surface clutter. Start with the night tables and sweep the tops for all tiny knick-knacks that have no purpose, tossing/donating/regifting as much as possible (be brutal!), and moving whatever you absolutely cannot part with to another room. A great tip for spaces that need to be tidied up quickly is to use trays on top of surfaces to collect your smaller items. When you need to convert the space for guests, you can easily stash the entire tray on a closet shelf, and return things to normal in just seconds when your company has left.

Step 3 – Attack the closet clutter. When your surfaces are clear, make room in the closet and place a few empty hangers to indicate that they are invited to unpack. If the dresser is full of your things, clear out at least the top drawer, so they don’t have to live out of their suitcase.

Step 4 – Freshen the room. Open a window to circulate some fresh air, change the bed linens, and you now have a clean stage to set for your guests’ upcoming stay. If necessary leave a bowl of vinegar in any room for 24 hours to remove any strong odors.

It’s the little things…

It doesn’t take much to make your guests feel special. Guest rooms are often used for multiple purposes, and you don’t want your guests to feel as if they’re intruding. Little touches let them know that room is intended just for them, and that sense of privacy will let them relax and feel at home. Try these tips for happy houseguests:

  • Don’t over crowd them. Add warmth through a few personal touches, such as a small display of photos in coordinating frames, but avoid bombarding your guests with a full gallery of your lifelong memories… this is their getaway, not yours!
  • Put together a welcome basket with mini toiletries, a new toothbrush, some guest soaps, and a fancy chocolate or other treats. Include a note with your Wi-Fi password and any other instructions they’ll need for their stay.
  • Leave fresh towels on the bed, tied with a ribbon. Add a yummy robe and spa slippers so they know they’re welcome to relax, and if you really want to impress, you can replace their washcloths with fresh ones each morning, before they wake up.
  • Make everything easy to find. Think of the little things they might need during their stay, and put them out in plain sight. A notebook and pen, tea or coffee, and an extra blanket or pillow, are items to consider having on hand.
  • Place fresh cut flowers on the nightstand, along with local magazines or guidebooks so your guests can see what they might like to explore in your city.

If you extend this authentic hospitality to your overnight guests, they’re sure to have an enjoyable and memorable visit. Please post your guest room photos to our Facebook page and inspire others with your ideas, or share your experiences in the comments below and tell us what your past hosts have done to make you feel welcomed. What’s the nicest thing you’ve experienced as a guest in someone else’s home?

Transitioning Your Lawn Into Winter: An Organized Approach

????????????If you’re planning on preparing your lawn for winter, it’s time to get started. Mid to late October (yes – last week!) is a great time to get your lawn in shape, if you want to groom it for the colder temps of the coming winter season. We’ve organized a few guidelines for a smooth transition. I may live in a condo in Washington, DC, but I really missing having a green yard to take care of. For those of you have an outdoor space to tend to, this post is for you!

Summer can be harsh on your lawn and depending on how yours fared, you will want to take precautions as seasons change to prolong the gorgeous green of summer, while getting your lawn ready for winter. Depending on where you live, you may already see signs of your lawn going dormant. Prevent browning by overseeding about two weeks before the first frost is predicted.

Locate and over-seed any bare patches on your lawn. Weeds are at a minimum this time of year, so seeds have less competition and will germinate quickly, allowing your lawn to fill in before the soil freezes. For larger bare spots, you can cut sod to fit for immediate gratification. Be sure to water sod daily for at least a week to help it take root.

Cool season grasses (including bluegrass, rye, and fescue) require fertilizer throughout the fall, as your climate dictates. Aerate before fertilizing for the best penetration of nutrients to your lawns root system and buy winterizing fertilizer for your lawn when you’re ready for your final application of the season. Cooler season grasses can require light watering, but they typically receive sufficient moisture from rain and snow.

After a long summer, soil can be significantly more workable than it will be in the early spring. Add a border of shrubs to your garden that will take root over the winter, and show your landscaping some love. If you have color beds, clear out your spent summer annuals, and plant your cool-weather annuals this month. Add a balanced slow-release fertilizer to the bed before planting. You haven’t missed the window for mustard seeds, turnips or lettuces for your fall garden, too.

Early fall is also a perfect time for mulching. Compost your grass clippings and all those leave that fall from now through November. They’ll come in handy for vegetable gardens and can be stored for landscaping projects next spring.

If your plans for next Spring include a revamp of your garden, use the upcoming winter to organize, prepare… and dream! Brainstorm how you want to use the space you have so you and your family can take full advantage of your property’s features.

Have you prepared and protected your lawn and garden for the coming cold weather? If not, what are you waiting for? Tell us about your space and what you’d like it to become, and share your best tips for a healthy autumn landscape… we want to hear from you!

Calendar Control: How To Manage Multiple Schedules With Ease

????????????When you schedule an appointment, do you save it in your phone, e-mail yourself a reminder, or scratch a note on paper so you can enter it into your into electronic calendar later on? If you’re overseeing schedules for your entire family, your challenge of calendar juggling is multiplied. You definitely need a system.

With a system in place, you’ll not only be less likely to forget appointments, you’ll be able to see how everyone’s schedule measures up, so you can be efficient in dealing with your agenda and theirs. Using a central calendar for the whole family lets everyone know what’s going on at any given time, and makes “finding time” as a family that much easier. An effective calendar system will show you just how much time you’ve been wasting worrying about what you may have missed.

WHERE TO START

There are plenty of online tools available to help manage your family’s hyperactive schedules, but we’re not going to rehash the best new app reviews for you. If you’re not a tech-friendly person to begin with, hi-tech solutions are probably not going to be the answer for you. From working with such a wide variety of clients, I know for sure that the best system for organizing is the system that you will keep using.

PAPER VS. PLASTIC: IT’S A PERSONAL CHOICE

Choosing between computer programs and a good old wall-mounted calendar is a personal choice, and there are benefits to both. If you currently manage your family schedule online, you don’t have to reinvent the wheel. Online solutions can combine your calendar functions with grocery and to do lists, photo sharing and social connections, but you need to find out what works for you, so you can make it work for your family, too.

If your kids are very young, an old-school wall calendar is going to work better than an online system that requires each family member to have a tablet or computer to access it. Even older kids with devices of their own may not be relied on to edit or check an online app for important updates. Real time updates are important, but for a functional family calendar, consistency is key. A wall-mounted calendar encourages regular engagement by everyone.

To start a new wall-mounted calendar system, there are a few things to consider:

  • Find a location, like the kitchen, to display your family’s new activity board where it will not be easily overlooked and where you can all view it together.
  • Choose a large format calendar with plenty of room for notes. If you don’t find what you like at your local office supply store, print a template from the Internet, or design it yourself so it will perfectly suit your needs.
  • Consider what you’ll want to include in your calendar, like school & event schedules, responsibilities such as who is on pick up duty, and relevant addresses or invitations. In addition to play dates, sport schedules and travel details, you can include chore assignments and other household responsibilities, if that works for you.
  • Assign a color to each family member and collect coordinating markers and pencils near the calendar for that person’s dedicated use. The colors will keep activities organized and notes decipherable on a busy calendar, and color-coded Post-it notes make it easy for everyone to contribute without letting the calendar become an indecipherable mess.
  • Fill in dates from all your other calendars. Start with recurring items, like tutors, ballet classes and birthdays. Make note of how overbooked each family member is, and where you might scale back, if necessary.

Make a point to peruse the calendar daily and discuss upcoming scheduling challenges during meals, when hopefully you’re sharing some tech-free time with your family. Get into the habit of checking your calendar regularly to cut down on conflicts and make managing your time much less stressful. If you schedule a lot of appointments over the phone, try to be on a cordless phone so you can do this while standing at the family calendar.

I’d love to hear how you tackle the task of managing your family’s jam-packed schedule? Do you prefer an online solution to the big board we’ve described here? Did you try it and it did not work? Share your ideas for getting you calendar organized in the comments below.

Continue Reading

Tired of being disorganized?

DOWNLOAD YOUR FREE DECLUTTER REPORT!

“11 Things to Discard Before Monday”
Get started immediately with
free organizing strategies*.
 
11 Things you're guaranteed to not need.
Some are funny while others are meant to stretch you.
Get started today!

Yes! You're ready to get started. Please check your email now to confirm you're not a robot. We'll send over the PDF once you prove you're human.
GMail users - check the 'promotions' tab if you're on your computer. Anyone else, please check your spam folder if you didn't get the confirmation email.